

I seem to be covering the progression I went through with cages in my recent posts.., Amazon cages and then custom cages. Now the final in the unplanned-for series: designing and printing your own.
I briefly touched on this in my last article and here I’ll flush it out a bit. Now, do note that I am still really new to this myself. I started messing with CAD in December and got my first printer in February.
So, why 3D print your own cages. Well there are a few reasons I can come up with:
To try different sizes before ordering the real thing: this is how I actually got started with it. I had spent quite a bit of money trying to get a nylon Bijou sized right before ordering in titanium and decided this would be a good excuse to pick up a printer. These cages don’t have to look good or even be functional. Maybe you just want to see what a 39 mm tube vs a 41 mm tube feels like. “Design” it in 10 minutes, have it off the printer in 30.
Actually print cages you intend to wear. These can either be your own designs or designs you download off the internet.
Prototype on your own printer before sending it one of several companies who will print it in steel or titanium for you. I had a custom ring printed in 316L stainless steel, polished, and the screw hole tapped for $75, shipping included.
You live in a repressive country that bans the import of chastity devices.
Maybe start selling them yourself.
You can probably use the printer for other things, I mean I guess.
Now, this article isn’t going to cover all of the details of 3D printing or modeling but rather give you an idea if this is something you might be interested in and give you some hooks into what you need to learn.
Do I actually need a printer?
Depends. Are your plans just to download designs to print? In that case, no. There are numerous printing services where you can upload your own designs and tell them how you want it printed and what you want them to print it out of. You upload your design files (STL), it’ll calculate the price and someone at the other end will print it and ship it.
So, this brings up an obvious question – will the guy on the other end see your cage. Yes, they will. Now is that a big deal? Probably not to them. I suspect 3D printing is often used in kink and like your doctor, I bet they’ve seen it all.
But there are basically two models out there for printing service. There’s the Shapeways model, the company that prints Cherry Keeper cages, where they run an industrial sized print farm using technologies like SLS (more on that later) that are out of reach to the average hobbyist. The other model is akin to Uber but instead of rides, it’s prints. The guy doing the printing may have a single printer on his desk, eight in his garage, or it could be a full blown business with employees and office space.
Here’s a fairly decent list of some of the services out there.
So, why can’t you just make your own designs and use one of these services? Well, you can but it’s really not practical. Getting a cage just right takes numerous prints. Using one of these services for a one-off print is perfectly viable. Using it for the number of iterations you will need to get a wearable cage – well, just go buy something from Steelwerks Extreme. And that’s to say nothing of the time. I can do a low-quality print of a cage and ring in about an hour or less and a high quality in about three or four hours. Compare that to a week.
You can’t beat having your own printer for rapid prototyping.
Do I actually need to learn 3D Modeling?
So, if you’re planning on just downloading STLs (models) and printing them yourself then no. And printing cages off the internet is probably a way a lot of people get started. I have never done this myself but there are a few sources for these and many of them can be found on r/3DPrintedChastity. There are also some print-it-yourself designs listed on r/chastitytraining’s wiki.
Ok, fine, I want to learn modeling…
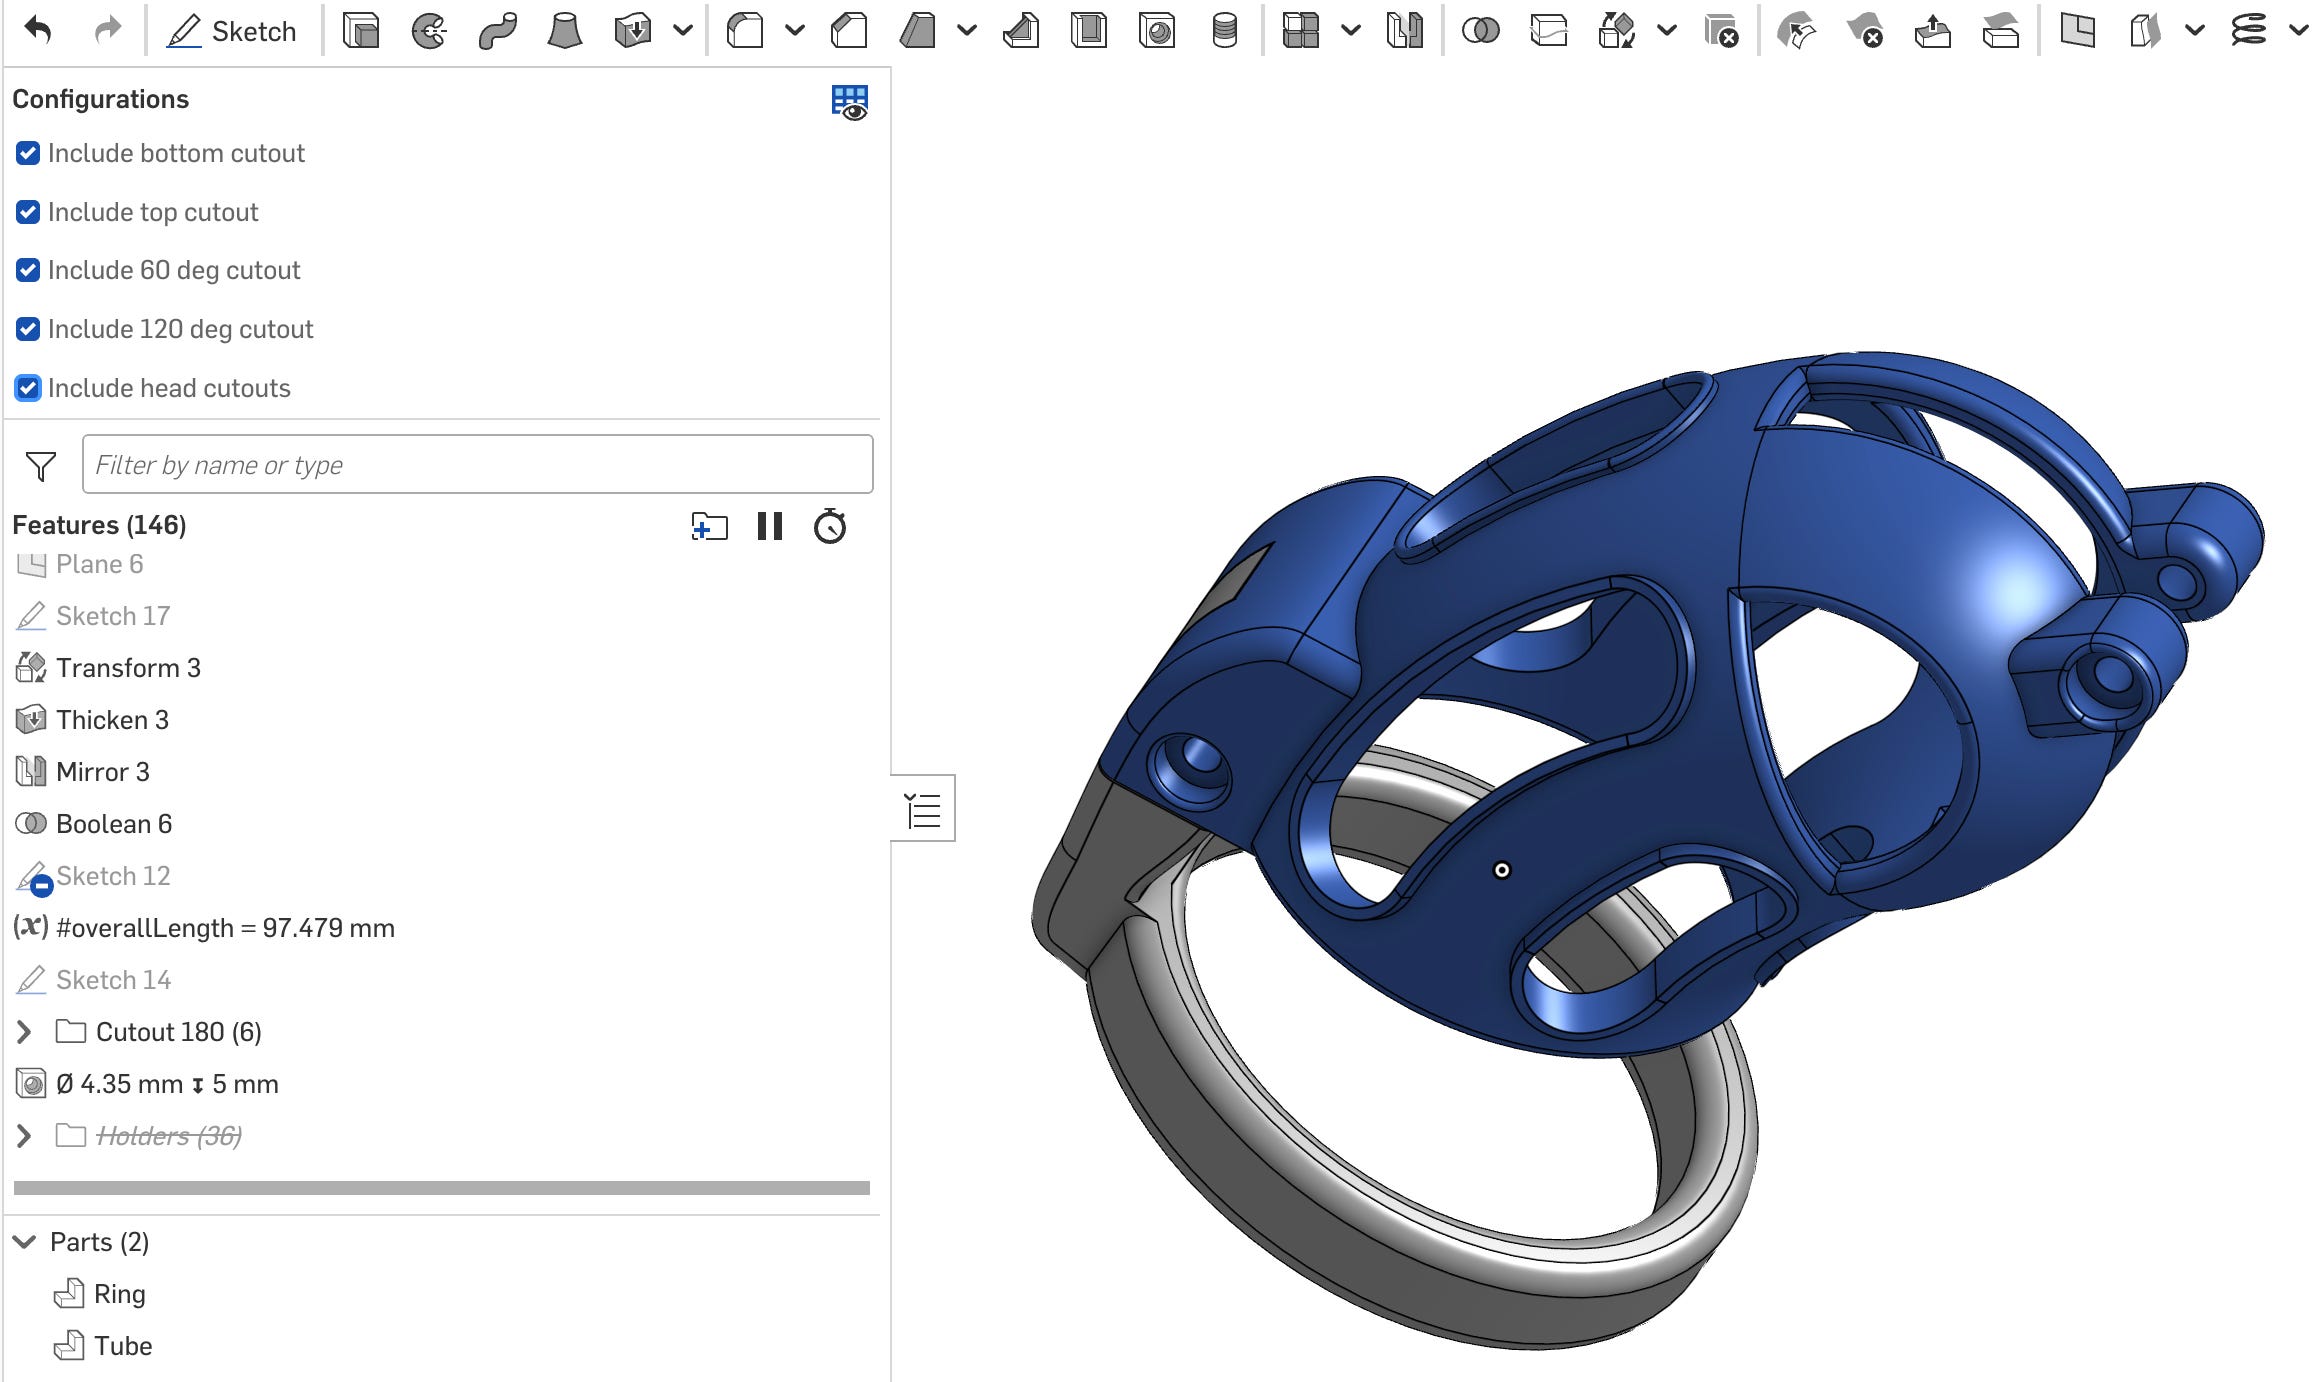
There are basically (as far as I know) two ways you can go with 3D modeling, CAD and mesh (polygon) modeling. I have never done mesh modeling but you can think of it like sculpting. With mesh modeling, you can easily get some very attractive and organic designs but you aren’t able to change them easily. For example, if you modeled a Cobra-like cage in Blender, the most popular tool for mesh modeling, and decided you wanted to change the size, you couldn’t just update a 60 to a 70 and it change. You would have to physically change the model. Whereas CAD is all about geometry and math. I can draw a circle and tell a CAD application like Fusion that that circle is 35 mm in diameter and then extend that circle into three dimensions to make a cylinder. I then can make the circle 40 mm and the cylinder will update. That’s called parametric CAD and if you want to play around with your cage’s sizing, that’s the way to go.
So, I am going to focus on CAD because it’s what I know. There are quite a few CAD applications that are free for hobbyist use (or open source) such as AutoDesk’s Fusion, OnShape, OpenSCAD, FreeCAD, and TinkerCAD. Many people start with TinkerCAD just to understand some of the concepts before moving onto a richer application. With recent updates to TinkerCAD allowing “sketches”, there’s a lot you can with it.
This isn’t going to be a CAD tutorial but the way a lot of these tools work is you draw something in 2D (a sketch) and then you perform some operation on it to make in 3D. Using these techniques, you can make pretty much anything.
And a quick tip about junctions because I really wish someone had told me this when I got started. Most of these CAD applications will have a “subtract” or remove feature where you can remove one part from another – this is how you easily make a junction, have the parts overlapping and then delete from the female end of the junction anything that overlaps with the male end of the junction. You’ll want an offset to make it delete just a little more because 3D printers aren’t perfect.
What kind of printers are there?
Lots of kinds. SLS (Selective Laser Sintering) and DMLS (Direct Metal Laser Sintering) are outside of the reach of hobbyists and are used only in industrial or commercial settings. Most of your 3D printed nylon cages are done with SLS and Evotion likely farms out their steel and titanium cages to a DMLS printer (those machines aren’t cheap).
For hobbyists, there’s FDM (Fused Deposition Modeling), and SLA (Stereolithography). I know very little about SLA other than you can get very detailed prints but you’re printing with very dangerous resins. Badass Workroom uses SLA for his test cages and RoosterCage prints many of their colors using SLA.
I’m going to cover the most popular, FDM. Why is it popular? It’s cheap and easy. You’re not worrying about resins that are highly toxic and PPE (Personal Protective Equipment). Your print material comes in spools, not jugs that shouldn’t be opened without ventilation. But SLA printing does have advantages and it’s well within the range of a hobbyist.
Great, I’ve got a printer and I’ve learned CAD. Now what?
Unfortunately, you can’t just throw some filament on the printer, crank a cage out, and expect it to be good to go. Printers use a technology called FDM – fused deposition modeling. Basically they print one layer at a time and those layers may be about 0.1 – 0.3 mm high. And each layer forms a little ridge. Guess how big a bacterium is? Smaller than 0.1 mm. So all those little ridges make very nice hangouts for chastity-funk.
Can you print a cage and throw it on? Sure. And you should feel safe wearing it for a day or two. And if you don’t care about the environment, you can print a new one every two days. I mean the price of PLA, the easiest to use filament, would make it about $1 / cage. But that’s a probably not what you want to do.
So, now we have to get into filaments.
PLA is the easiest filament to print with. It doesn’t require anything special and it’s very inexpensive. A kilogram of it will run you something like $15. I primarily use it for prototyping. A quick size check? Make sure the junction works? Do I actually like the look of it? PLA is the way to go.
Now, you can make PLA long-term wearable. I don’t personally have any experience with it but you can add an epoxy coating and make it wearable assuming the epoxy is skin-safe.
What other options are there? Well, this is where your little table top printer starts to expand and take up more and more space in your house: ABS.
Printing in ABS is a bit trickier than PLA. For one, ABS requires a lot higher temperatures and needs to be printed in an enclosure otherwise the cooler air around the print causes it to warp and pop off the print plate. And there’s another reason ABS needs an enclosure. When you melt ABS some of it breaks down chemically into styrene which gets into the air and you don’t really want to be breathing it. So, most people go with active ventilation – something like a computer case fan mounted on the enclosure with a dryer vent duct running out the window. This is the point where your wife starts becoming increasingly skeptical of the need to keep your orgasms under her control.
So, why all this messing around with ABS? I mean we still have layer lines.
Two words: Vapor Smoothing.
A lot of plastics are vapor smoothable but ABS has the property of being vapor smoothable with a relatively safe solvent: acetone aka fingernail polish remover. Now relatively safe is… relative. Acetone is a skin, eye, and lung irritant and it’s extremely flammable so precautions are needed but its extremely safe compared to the solvents that are needed to vapor smooth PLA.
So, you get your print, you throw it in a PET container (PET is one of the few transparent plastics that acetone won’t damage) with some acetone-soaked paper towels and wait for an hour or so, pull it out and voila, you now have a nice glossy cage without any layer lines. But pro-tip, don’t touch it until it fully dries as it will be in a semi-liquid state for a while.
How much is all this going to cost me anyway?
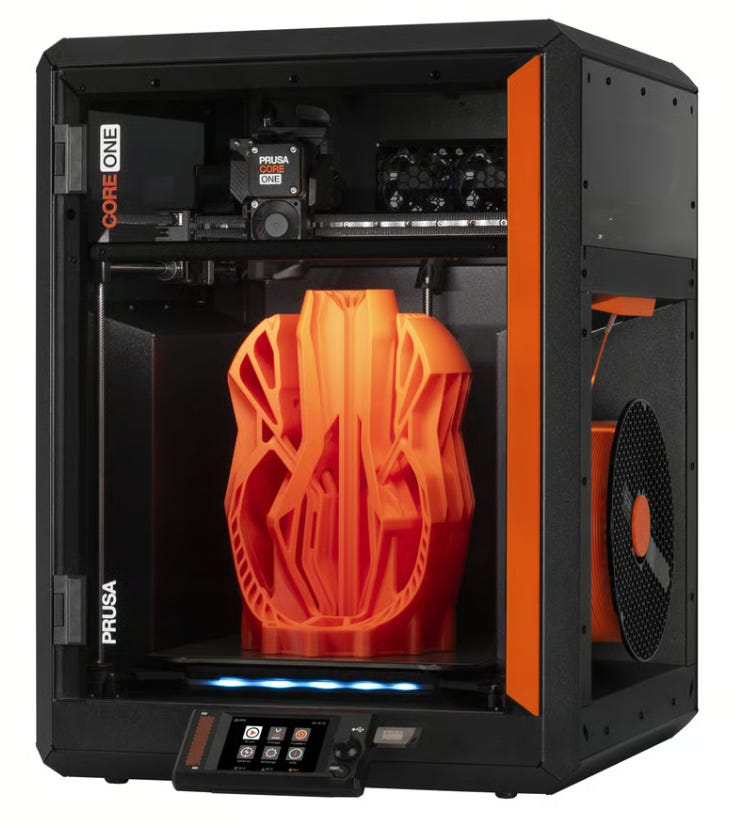
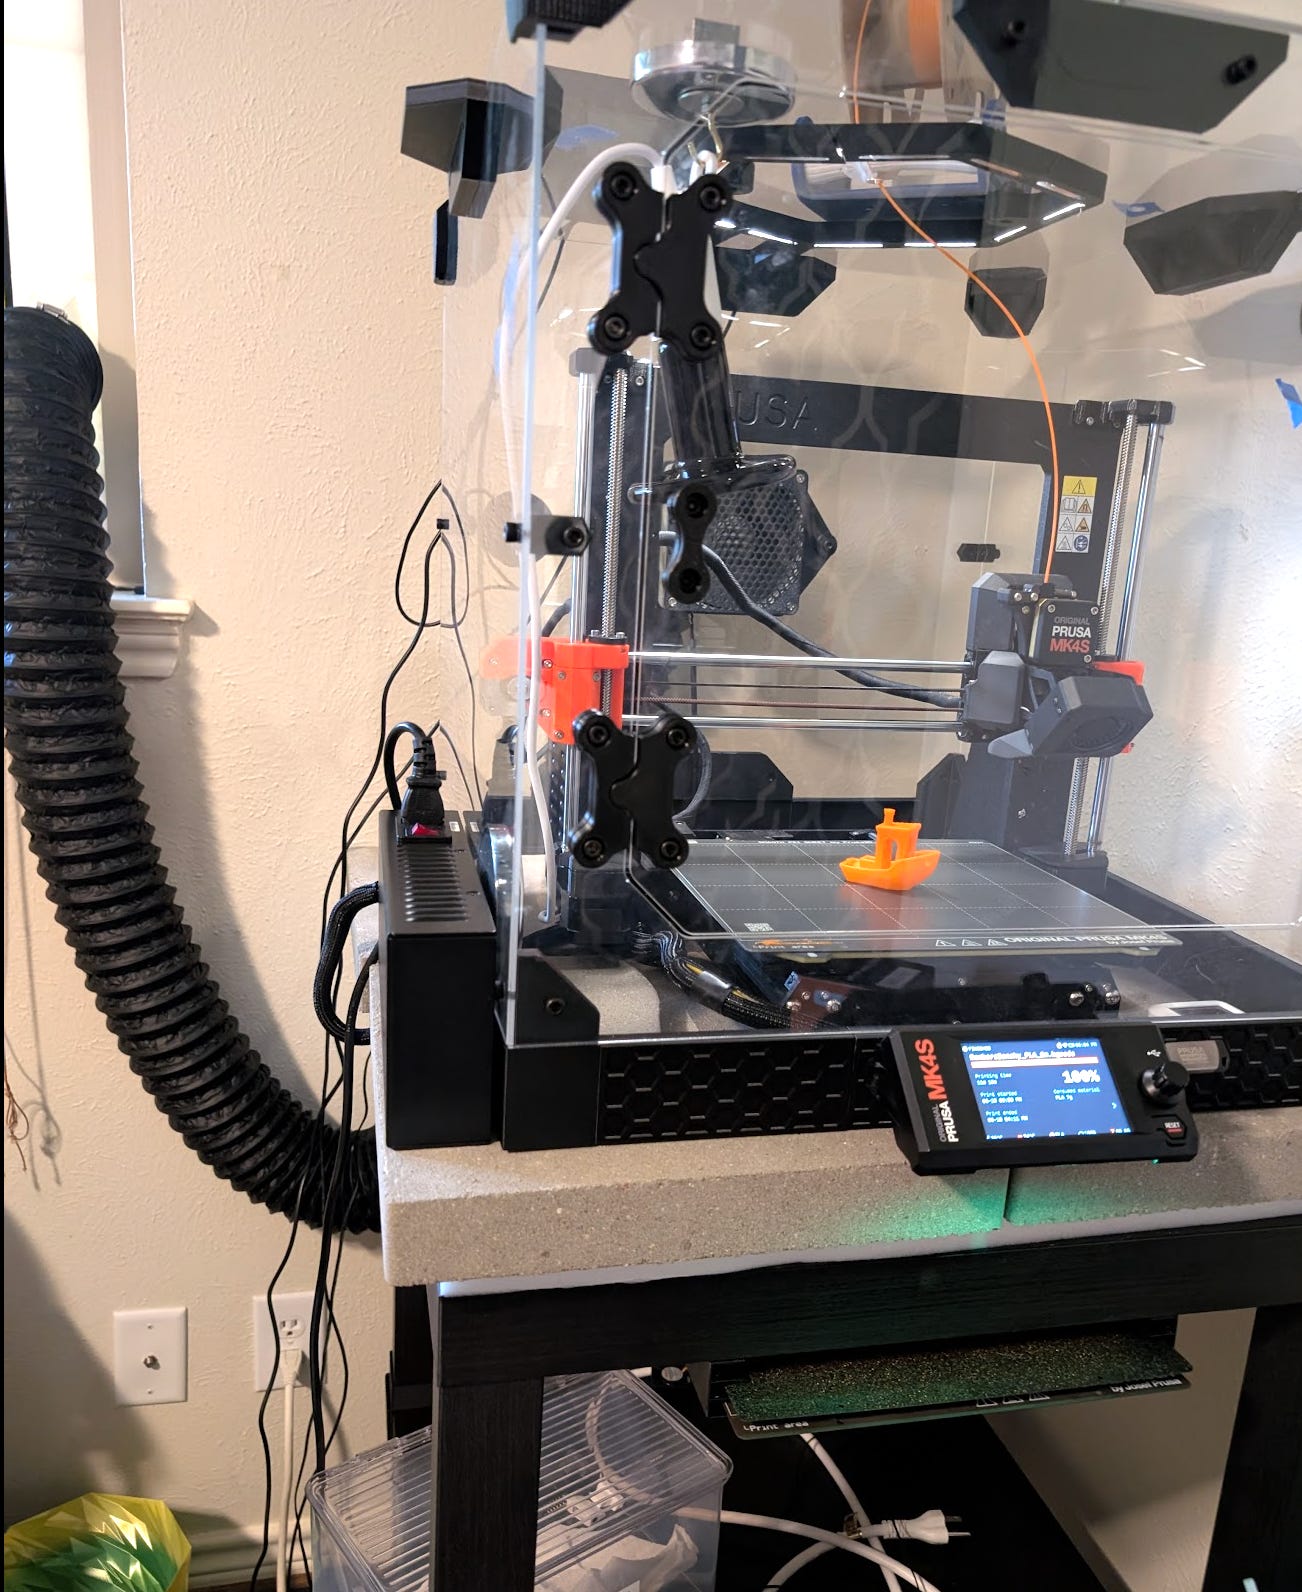
I can tell you how much I’ve spent, probably $1,500 and that’s including the enclosure and all the accutroments. The printer, a Prusa MK4S, was about $1,000. But that’s a pretty nice printer and Prusas are always more expensive for various reasons. A perfectly usable Bambu Lab A1 Mini is only $250 and the ABS-capable (more on that later) P1S is $550.
Do I really want to get into all of this?
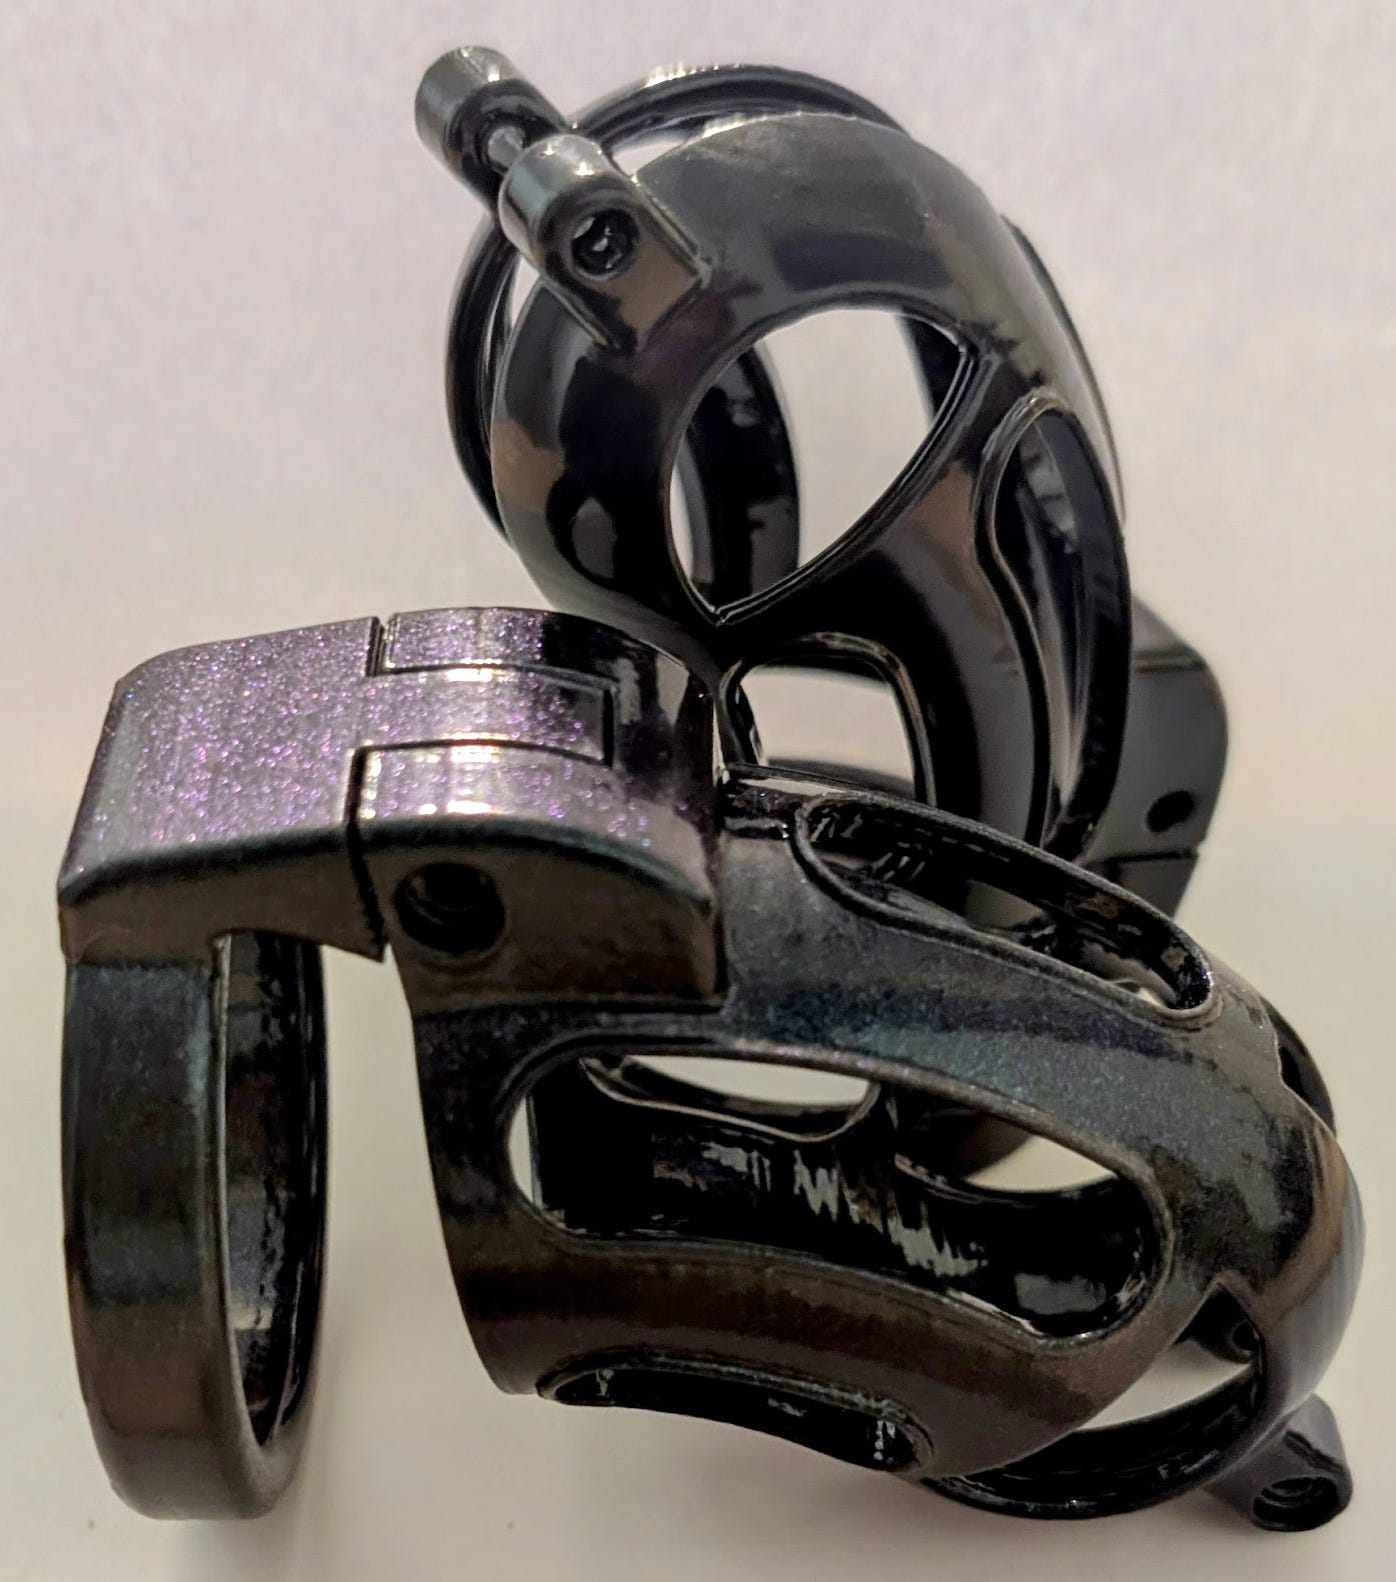
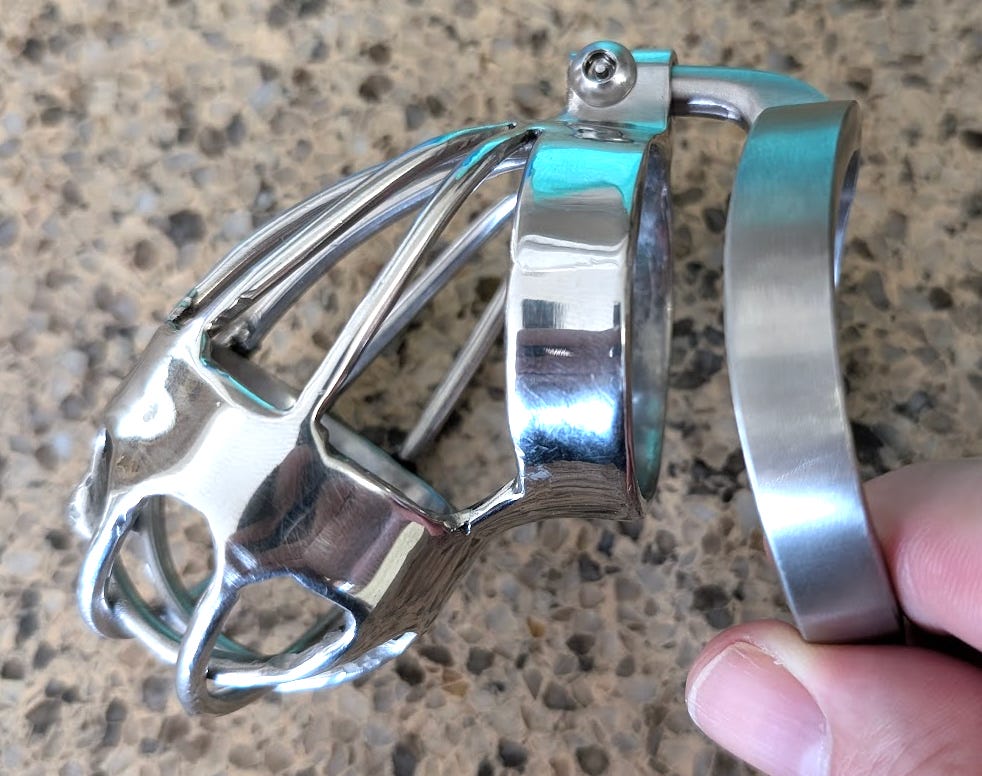
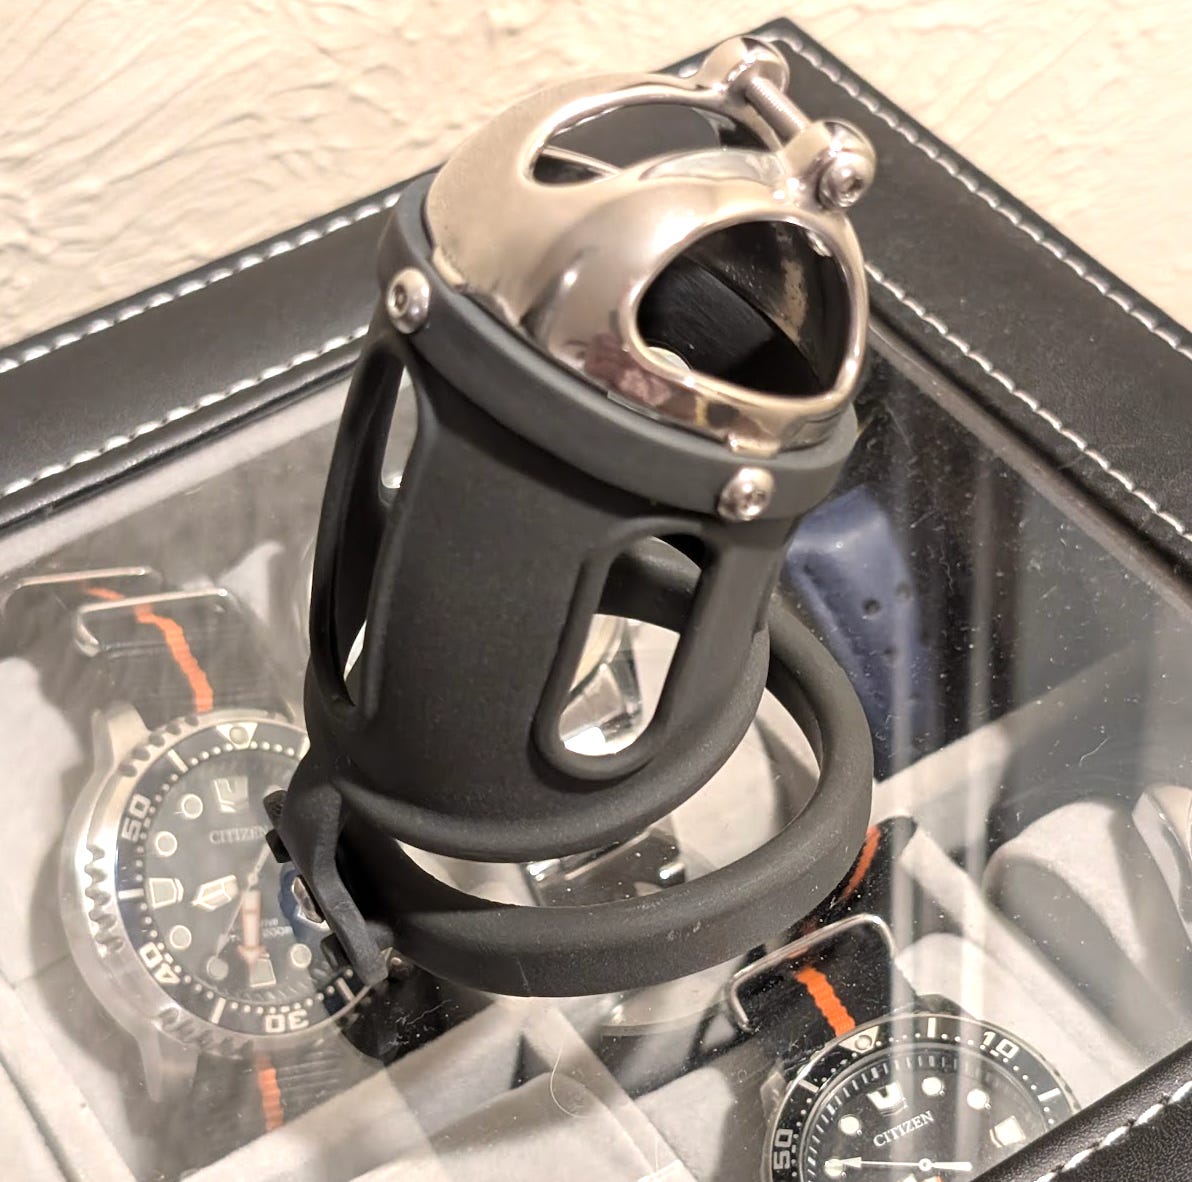
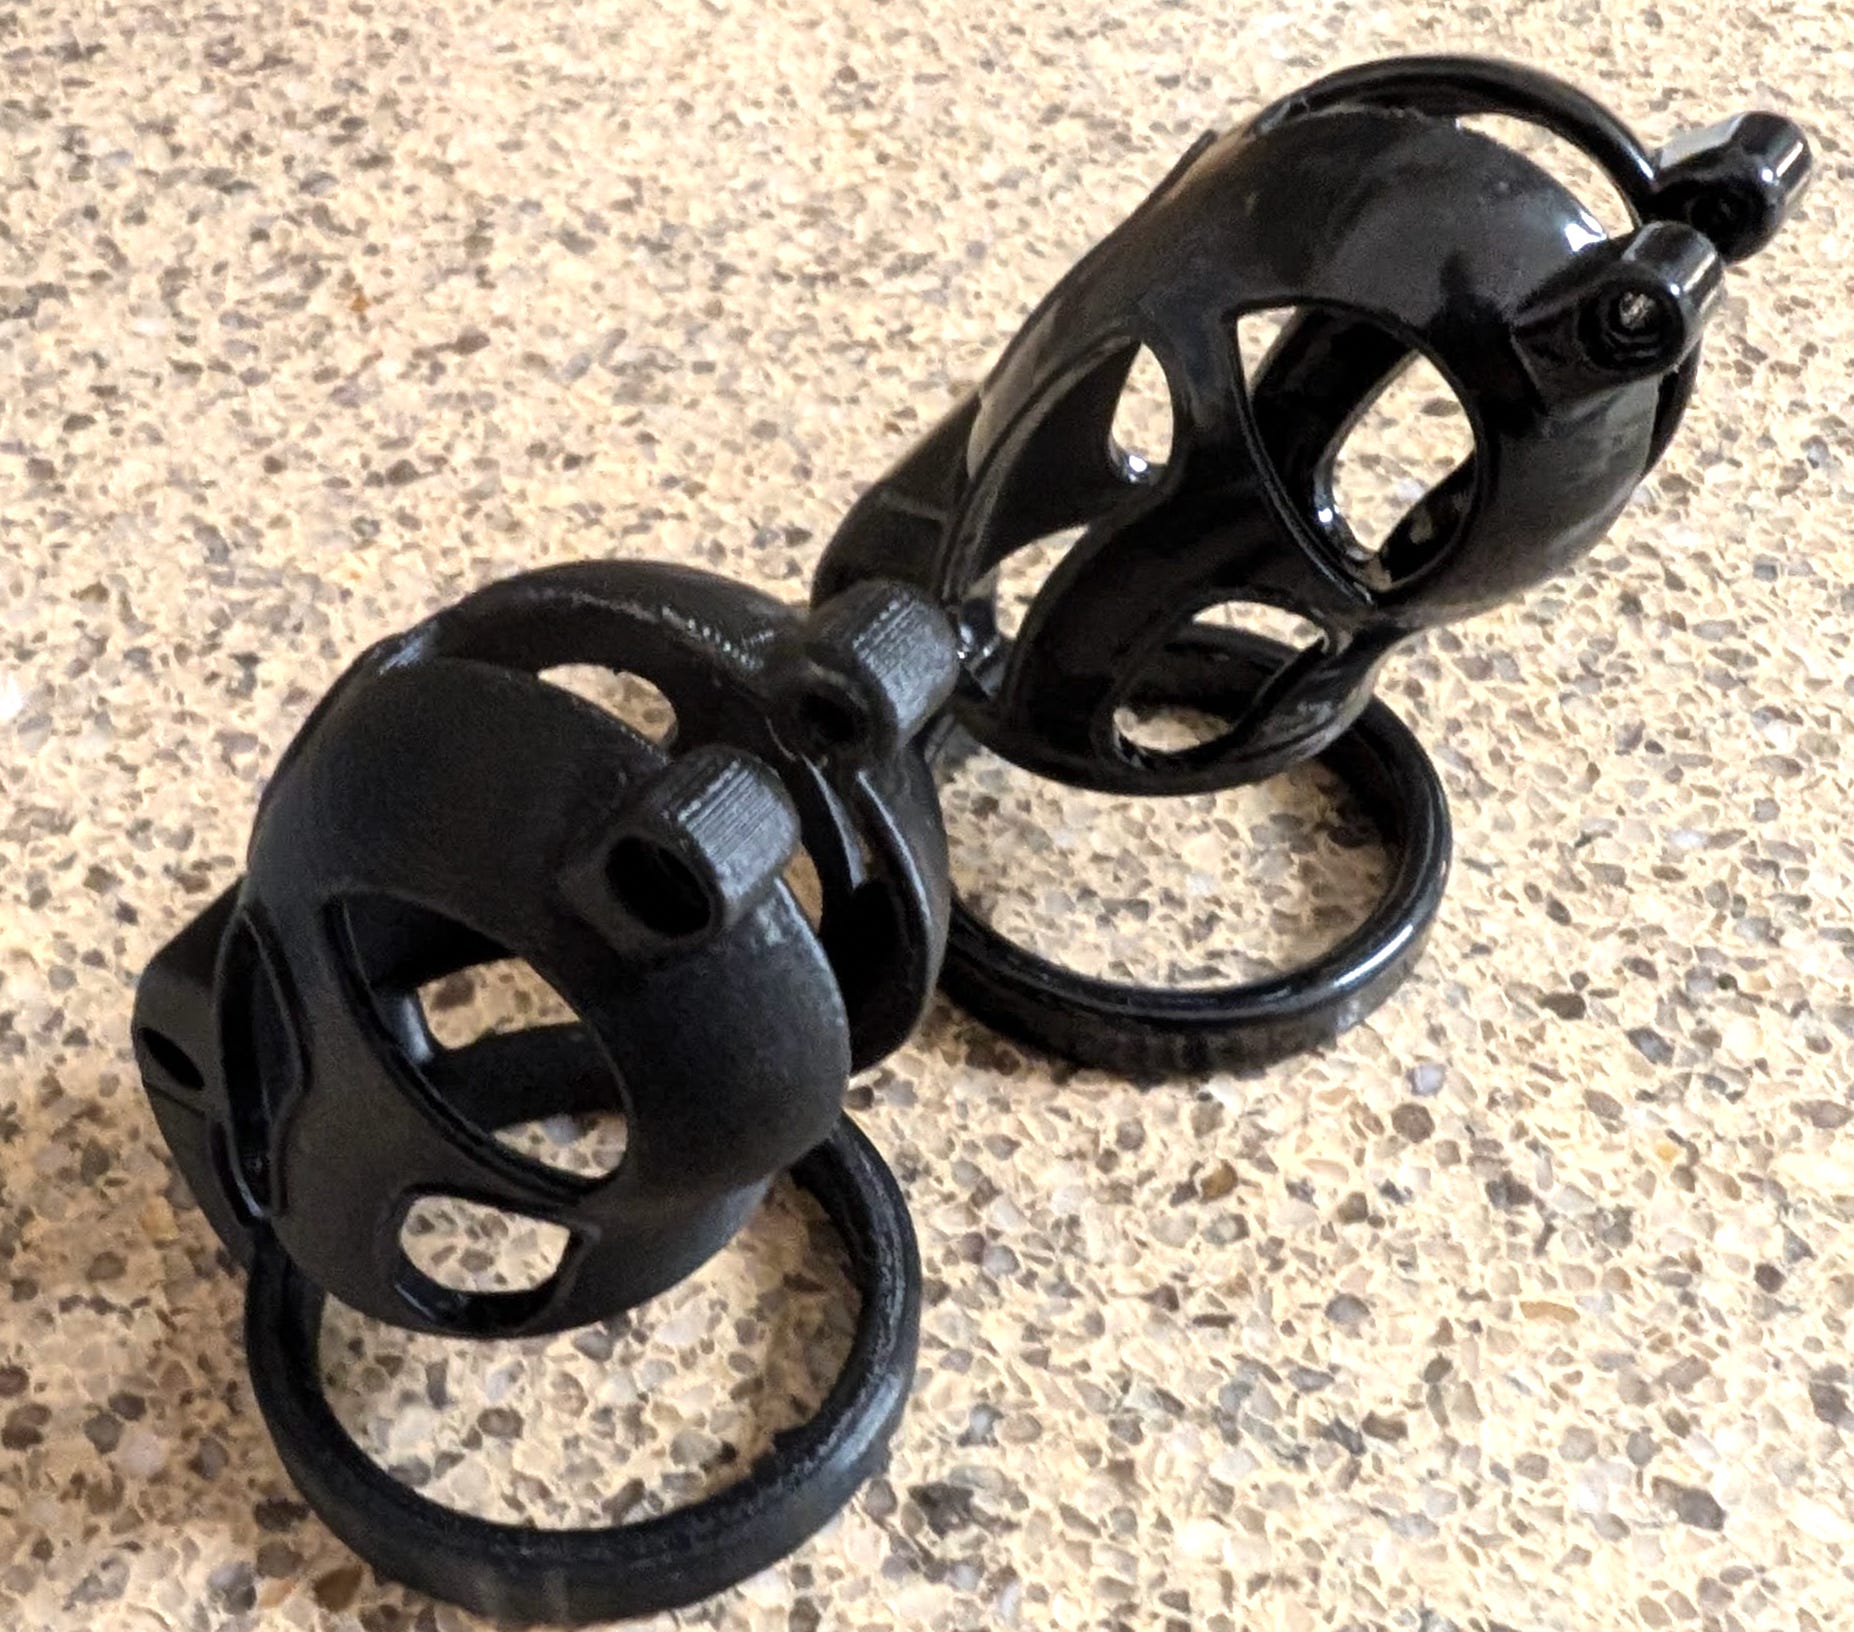
Probably not. There is something to designing your own cage from scratch, printing it, then iterating on it. While I have several wonderful steel and titanium cages, this one plastic one is actually my favorite because it’s my own creation. And I happen to think it looks pretty cool too. Oh, and it’s my only properly-fitting tetherspout-secured cage.
But something else I’ve learned. 3D printers can do more than print chastity cages. They can also print containers to secure emergency keys; don’t worry, I won’t be quitting my day job any time soon.
I do now have a CAD tutorial for designing your own cage!

One thing not brought up is, I have heard, Resin isn't skin-safe or "biocompatible", even after curing. You probably don't want a bracelet worn for a day, let alone a cage, printed out of any but extremely expensive specialty resin.
So, that's an even more compelling reason not to go with that kind!